Friday, October 25, 2019

How to Reset the Toner in Your Brother Printer


Do you have a Brother printer that's telling you that the toner is low or empty? Don't worry, you can reset the toner counter and keep using your printer until the toner cartridge is actually empty.

To reset the toner in your Brother printer, follow these steps:
  • Turn off the printer and open the front cover.
  • Then turn the printer on.
  • The printer will display “Cover is open” or “Close cover”, then press the 1 key to display the Reset menu.
  • Locate the correct toner option to reset and select it.
  • If performed correctly the printer will display “Accepted“.

Here are some tips for resetting the toner in your Brother printer:
  • Make sure that the printer is turned off before you open the front cover.
  • If the printer is still displaying the “Cover is open” message after you close the front cover, press the 1 key again.
  • If you are not sure which toner option to select, consult your printer's manual.
  • If you have a Brother printer with multiple toner cartridges, you will need to reset each toner cartridge individually.

Here is a table of the toner cartridge code system that Brother uses:

ColorCode
BlackK
MagentaM
CyanC
YellowY
TonerTNR
Starter cartridgeSTR
Standard tonerSTD
High yield/high capacity tonerHY or HC

How to setup Bigpond.com (Telstra Mail) in Mac desktop email app

If you don't have an email account set up, Mail prompts you to add your email account.

To add another account, choose Mail > Add Account from the menu bar in Mail. Or choose Apple menu > System Preferences, click Internet Accounts, then click the type of account to add.
  • When adding an account, if you get a message that your account provider requires completing authentication in Safari, click Open Safari and follow the sign-in instructions in the Safari window.
  • If necessary, Mail might ask you for additional settings.

IMAP Settings

IMAP Server: imap.telstra.com
IMAP Port: 993
IMAP Security: SSL/TLS
IMAP Username: Your full email address
IMAP Password: Your Bigpond.com password

SMTP Settings

SMTP Server: smtp.telstra.com
SMTP Port: 465
SMTP Security: SSL/TLS
SMTP Username: Your full email address
SMTP Password: Your Bigpond.com password

How to hardware reset Alienware x51 BIOS


The Alienware X51 is a small form factor gaming PC that packs a serious punch. It's the perfect choice for gamers who want a powerful machine that doesn't take up too much space.

The X51 is available in a variety of configurations, so you can choose the one that's right for you. The base model comes with an Intel Core i3 processor, 6GB of RAM, and a NVIDIA GeForce GTX 645 graphics card. This is enough power to play most games at 1080p resolution.

If you want more power, you can upgrade to a Core i5 or Core i7 processor, more RAM, or a more powerful graphics card. The X51 can even be configured with a VR-ready graphics card, so you can experience the latest virtual reality games.

In addition to its powerful hardware, the X51 also has a sleek and stylish design. The case is black and silver, with a honeycomb pattern on the front. The X51 is also relatively quiet, even when it's under heavy load.

Overall, the Alienware X51 is a great choice for gamers who want a powerful and compact gaming PC. It's not the cheapest option on the market, but it's worth the investment if you're serious about gaming.


Here are the steps on how to reset the BIOS to factory default settings on an Alienware X51:
  1. Lay the system on the right side.
  2. Remove the stability foot.
  3. Remove both the left and right side panels.
  4. Locate the CMOS jumper (CLEAR_CMOS1) on the system board. It is a small jumper with two pins. The pins are labeled 1 and 2.
  5. Use a small screwdriver to remove the jumper plug from pins 2 and 3.
  6. Place the jumper plug on pins 1 and 2.
  7. Wait for approximately five seconds.
  8. Remove the jumper plug from pins 1 and 2.
  9. Replace the left side panel.
  10. Replace the stability foot.


Note: Resetting the BIOS will erase all of the custom settings that you have made, such as the boot order, the time and date, and the power settings. You will need to re-enter these settings after the reset.

Thursday, October 24, 2019

TOP 5 QNAP Server Software Alternatives - Free and Open-source Network Attached Servers


Here are the free alternatives for QNAP:
  1. FreeNAS
  2. NAS4Free / XigmaNAS
  3. OpenMediaVault
  4. Openfiler
  5. Rockstor

FreeNAS - https://www.freenas.org


FreeNAS is an operating system that can be installed on virtually any hardware platform to share data over a network. FreeNAS is the simplest way to create a centralized and easily accessible place for your data. Use FreeNAS with ZFS to protect, store, backup, all of your data. FreeNAS is used everywhere, for the home, small business, and the enterprise.

FreeNAS is a free and open-source network-attached storage (NAS) software based on FreeBSD and the OpenZFS file system. It is licensed under the terms of the BSD License and runs on commodity x86-64 hardware. FreeNAS supports Windows, macOS and Unix clients and various virtualization hosts such as XenServer and VMware using the SMB, AFP, NFS, iSCSI, SSH, rsync and FTP/TFTP protocols. Advanced FreeNAS features include full-disk encryption and a plug-in architecture for third-party software.

XigmaNAS - https://www.xigmanas.com


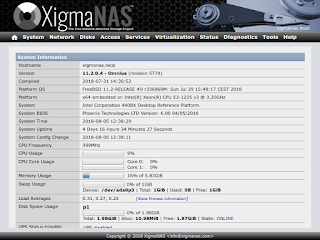
XigmaNAS is an embedded open-source NAS software distribution based on the latest release of FreeBSD. It developed from the original FreeNAS 7 code and updated to work with the current latest FreeBSD releases. However, "XigmaNAS preserves FreeNAS’s original m0n0wall/PHP architecture and introduces experimental support for the ARM architecture."

XigmaNAS supports sharing across Windows, Apple, and UNIX-like systems. It includes ZFS v5000, Software RAID (0,1,5), disk encryption, S.M.A.R.T. and email reports etc., with the following protocols: SMB, Samba Active Directory Domain Controller AD, FTP, NFS, TFTP, AFP, rsync, Unison (file synchronizer), iSCSI (initiator and target), HAST, CARP, Bridge, UPnP, and BitTorrent. All of this is configurable by its web interface.

OpenMediaVault - https://www.openmediavault.org

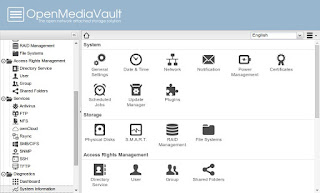
openmediavault is the next generation network-attached storage (NAS) solution based on Debian Linux. It contains services like SSH, (S)FTP, SMB/CIFS, DAAP media server, RSync, BitTorrent client and many more. Thanks to the modular design of the framework it can be enhanced via plugins.

openmediavault is primarily designed to be used in small offices or home offices, but is not limited to those scenarios. It is a simple and easy to use out-of-the-box solution that will allow everyone to install and administrate a Network Attached Storage without deeper knowledge.

Openfiler - https://www.openfiler.com


Openfiler is an operating system that provides file-based network-attached storage and block-based storage area network. It was created by Xinit Systems, and is based on the CentOS Linux distribution. It is free software licensed under the GNU GPLv2

The Openfiler codebase was started at Xinit Systems in 2001. The company created a project and donated the codebase to it in October 2003.

The first public release of Openfiler was made in May 2004. The latest release was published in 2011.

Although there has been no formal announcement, there is no evidence that Openfiler is being actively developed since 2015. DistroWatch has listed Openfiler as discontinued. The official website states that paid support is still available.

Rockstor - http://rockstor.com


An overview of top features in Rockstor.
  • Linux, BTRFS based open source storage OS. Runs on commodity hardware.
  • Bitrot protection, checksums, compression and other advanced filesystems (BTRFS) features.
  • Simple GUI installer and secure browser-based management.
  • Copy-on-write Snapshots of Shares on demand and on schedule.
  • File sharing and access from Linux, Mac, Windows and Mobile devices.
  • Instant and efficient Clones of Shares and Snapshots.
  • Fast and online vertical capacity scaling.
  • File backup with Rsync, Apple Time Machine and Windows Backup.
  • Disaster recovery is made easy by Rockstor to Rockstor replication.
  • Apps(Rock-ons) for media streaming, backups, cloud storage and more.
  • REST API for application developers.
  • Resource monitoring with customizable Dashboard and SNMP.

Can't find a network/ethernet device driver Windows 7?

Download Driverpack solutions from https://drp.su/en/foradmin. Extract the file to a USB drive and run the program. It will automatically detect and will offer to install or update drivers for Windows 7.